
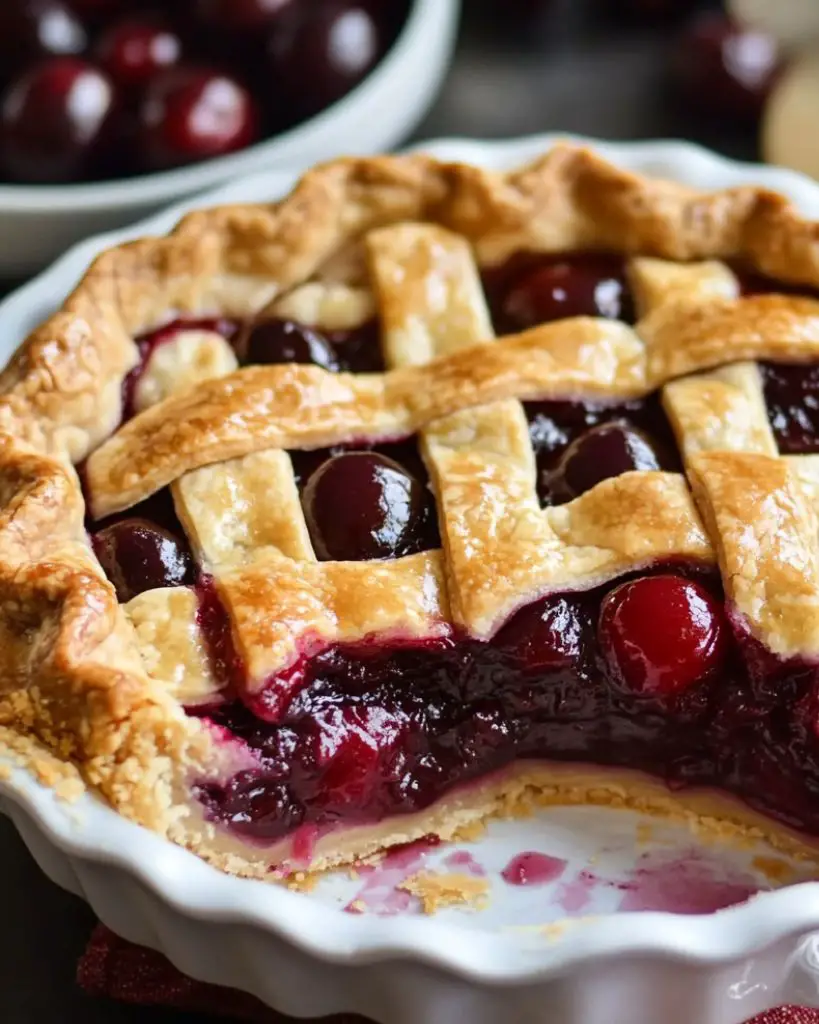
This Foolproof Cherry Pie is a classic dessert that combines fresh or frozen cherries with a buttery, flaky all-butter pie crust. The homemade cherry filling is thickened with cornstarch and flavored with vanilla, almond extract, and a touch of lemon juice, creating a mouthwatering, juicy filling. Topped with a beautiful lattice crust, this pie is the perfect balance of sweet and tart, making it an ideal dessert for any occasion, from holidays to casual get-togethers. With step-by-step instructions for making a flaky pie crust and a juicy cherry filling, this pie is sure to become a family favorite.
Ingredients
For the Pie Crust:
- 2 batches of foolproof all-butter pie crust
For the Cherry Pie Filling:
- 2 pounds fresh or frozen cherries, pitted
- 3 tablespoons cornstarch
- 1/2 cup (99g) granulated sugar
- 1/2 teaspoon salt
- 2 teaspoons vanilla extract
- 1/2 teaspoon almond extract
- 1 and 1/2 tablespoons freshly squeezed lemon juice
- 2 tablespoons unsalted butter, cut into small cubes
For the Egg Wash:
- 1 large egg
- 2 teaspoons water
For the Lattice Topping:
- 2 tablespoons sparkling sugar (optional)
Instructions
Prepare the Pie Crust:
- Begin by refrigerating your prepared all-butter pie dough. Remove it from the fridge 10 minutes before rolling, as overly cold dough may crack.
- Lightly flour your work surface and rolling pin. Roll the dough from the center outward, rotating the disc every few strokes. Add flour as needed to prevent sticking. Continue rolling until the dough is about 3 inches larger than the pan and approximately 1/8″ to 1/4″ thick.
- Carefully fold the dough in half and transfer it to a buttered pie pan, placing the center seam in the middle. Unfold and gently press the dough into the pan.
- Use a fork to burst any air bubbles, and trim the dough overhang to about 1 and 1/2 inches. Cover with plastic wrap and refrigerate for at least 1 hour, or up to 48 hours. Dough can also be frozen for up to 2 months.
Prepare the Lattice Strips:
- Roll out the second batch of dough into a 12-inch circle on a lightly floured surface.
- Using a pastry cutter, slice the dough into 10 strips, each about 1 to 1.5 inches wide. Place the strips on a parchment-lined baking sheet and refrigerate until ready to assemble the pie.
Prepare the Cherry Pie Filling:
- In a large saucepan over medium-high heat, combine the pitted cherries, cornstarch, sugar, salt, vanilla, almond extract, and lemon juice. Stir almost constantly as the mixture simmers and thickens, about 8 minutes.
- Reduce the heat to low and cook for an additional 2 minutes. Remove from heat and transfer to a heatproof bowl to cool to room temperature.
Assemble the Pie:
- Preheat the oven to 425°F (220°C).
- Scrape the cooled cherry filling into the prepared pie crust. Dot the filling with cubes of butter.
- Lay 6 strips of dough parallel on top of the filling, leaving about a 1/2-inch gap between them. Fold back every other strip and add a perpendicular strip. Unfold the strips over the new strip, continuing the weaving process until the entire pie is covered.
- Trim the edges of the lattice, leaving about a 1/2-inch overhang. Roll the excess dough up to tightly sit on the pie plate, then crimp the edges.
- Brush the crust edges with the egg wash and sprinkle with sparkling sugar if desired.
- Place the pie on a baking sheet and bake for 15 minutes. Reduce the oven temperature to 350°F (175°C) and continue baking for 50 minutes, or until the crust is golden and the filling is bubbling.
- Let the pie cool on a wire rack for at least 2 hours before slicing.
Why You’ll Love This Recipe
- Classic and Delicious: This cherry pie is the ultimate comfort food, with a perfect balance of sweet, tart cherries and buttery, flaky crust.
- Foolproof Crust: The all-butter pie crust is easy to prepare and guarantees a tender, flavorful base for the filling.
- Perfect for Any Occasion: Whether it’s a holiday or just a special treat, this pie is sure to impress friends and family.
- Bubbling with Flavor: The homemade cherry filling is thickened with cornstarch and enriched with a dash of vanilla and almond extract, creating a flavorful and juicy filling.
Tips
- Cold Dough is Key: Always refrigerate your pie dough before working with it to ensure it’s easy to handle and prevents cracking.
- Perfect Lattice: If the dough becomes too soft while assembling, refrigerate the strips for 10-15 minutes to make the weaving process easier.
- Check for Doneness: The pie is done when the crust is golden and the filling is visibly bubbling through the lattice.
Variations and Substitutions
- Other Fruit Fillings: Swap the cherries for other fruits like blueberries, peaches, or mixed berries for a different flavor.
- Use a Store-bought Crust: If short on time, substitute the homemade all-butter crust with a high-quality store-bought option.
- Gluten-Free Version: For a gluten-free pie, use a gluten-free pie crust and ensure the cornstarch is certified gluten-free.
- Add Spices: Add cinnamon or nutmeg to the filling for a warm, spiced flavor.
FAQs
Can I make the pie crust ahead of time?
Yes! You can make the pie dough and store it in the refrigerator for up to 48 hours or freeze it for up to 2 months.
Can I use frozen cherries?
Absolutely! Frozen cherries work well in this recipe. Just make sure to thaw and drain them to avoid excess liquid in the filling.
Why is my crust soggy?
To prevent a soggy bottom, ensure your pie is baked until the crust is golden and the filling is thick and bubbly. You can also blind-bake the bottom crust before adding the filling for extra crispiness.
Serving Suggestions
- Serve warm with a scoop of vanilla ice cream or a dollop of freshly whipped cream for a delightful dessert.
- Pair with a cup of tea or coffee for a cozy afternoon treat.
- Enjoy it as a stand-alone dessert or alongside a fruit salad for a complete meal.
This Foolproof Cherry Pie is the perfect sweet finish to any meal, offering delicious flavor and beautiful presentation!
Foolproof Cherry Pie Recipe
9
servings1
hour1
hour5
Ingredients
For the Pie Crust:
2 batches of foolproof all-butter pie crust
For the Cherry Pie Filling:
2 pounds fresh or frozen cherries, pitted
3 tablespoons cornstarch
1/2 cup (99g) granulated sugar
1/2 teaspoon salt
2 teaspoons vanilla extract
1/2 teaspoon almond extract
1 and 1/2 tablespoons freshly squeezed lemon juice
2 tablespoons unsalted butter, cut into small cubes
For the Egg Wash:
1 large egg
2 teaspoons water
For the Lattice Topping:
2 tablespoons sparkling sugar (optional)
Directions
- Prepare the Pie Crust:
- Begin by refrigerating your prepared all-butter pie dough. Remove it from the fridge 10 minutes before rolling, as overly cold dough may crack.
- Lightly flour your work surface and rolling pin. Roll the dough from the center outward, rotating the disc every few strokes. Add flour as needed to prevent sticking. Continue rolling until the dough is about 3 inches larger than the pan and approximately 1/8″ to 1/4″ thick.
- Carefully fold the dough in half and transfer it to a buttered pie pan, placing the center seam in the middle. Unfold and gently press the dough into the pan.
- Use a fork to burst any air bubbles, and trim the dough overhang to about 1 and 1/2 inches. Cover with plastic wrap and refrigerate for at least 1 hour, or up to 48 hours. Dough can also be frozen for up to 2 months.
- Prepare the Lattice Strips:
- Roll out the second batch of dough into a 12-inch circle on a lightly floured surface.
- Using a pastry cutter, slice the dough into 10 strips, each about 1 to 1.5 inches wide. Place the strips on a parchment-lined baking sheet and refrigerate until ready to assemble the pie.
- Prepare the Cherry Pie Filling:
- In a large saucepan over medium-high heat, combine the pitted cherries, cornstarch, sugar, salt, vanilla, almond extract, and lemon juice. Stir almost constantly as the mixture simmers and thickens, about 8 minutes.
- Reduce the heat to low and cook for an additional 2 minutes. Remove from heat and transfer to a heatproof bowl to cool to room temperature.
- Assemble the Pie:
- Preheat the oven to 425°F (220°C).
- Scrape the cooled cherry filling into the prepared pie crust. Dot the filling with cubes of butter.
- Lay 6 strips of dough parallel on top of the filling, leaving about a 1/2-inch gap between them. Fold back every other strip and add a perpendicular strip. Unfold the strips over the new strip, continuing the weaving process until the entire pie is covered.
- Trim the edges of the lattice, leaving about a 1/2-inch overhang. Roll the excess dough up to tightly sit on the pie plate, then crimp the edges.
- Brush the crust edges with the egg wash and sprinkle with sparkling sugar if desired.
- Place the pie on a baking sheet and bake for 15 minutes. Reduce the oven temperature to 350°F (175°C) and continue baking for 50 minutes, or until the crust is golden and the filling is bubbling.
- Let the pie cool on a wire rack for at least 2 hours before slicing.

Leave a Reply